
World War II
Puzzle 66 · Breakout, Pursuit, and Holland · Page 95 in print
Arnhem Oosterbeek
Roughly 2,400 Allied troops escaped across the Rhine from Oosterbeek on 25-26 September 1944.
Jump to a word
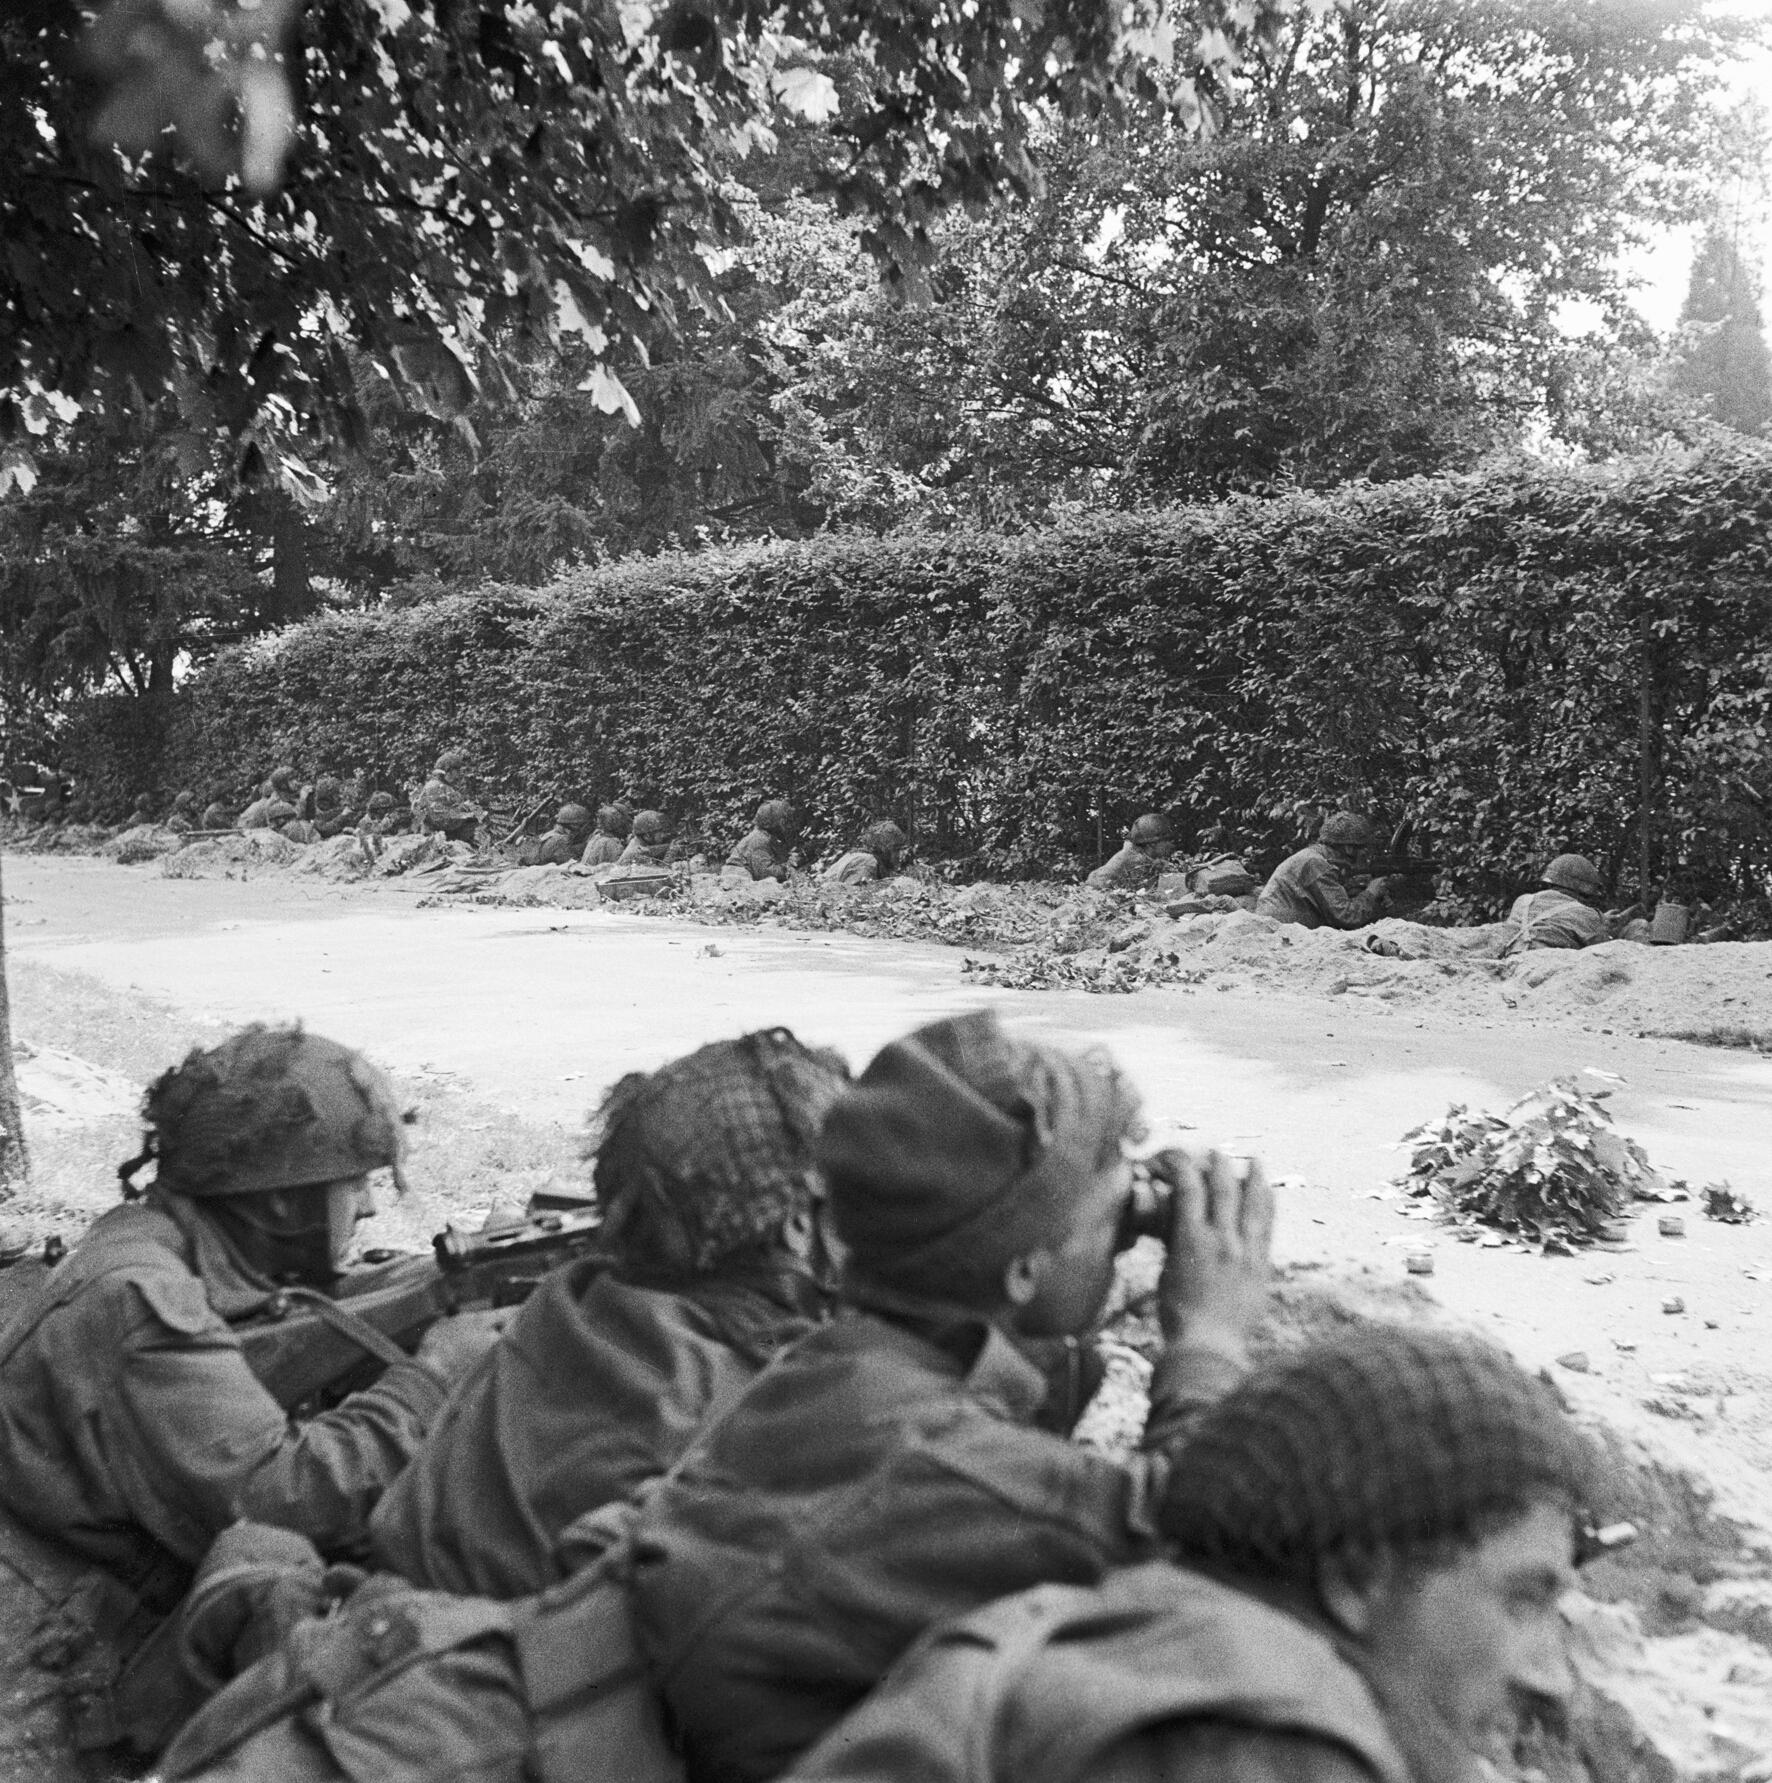
Men of the 1st Battalion, Border Regiment, in roadside positions at Oosterbeek in September 1944.
D. M. Smith / No. 5 Army Film and Photographic Unit / Imperial War Museums (BU 1103) · Public domain · Original recordImage changes
Display copies resized; original downloaded JPEG preserved.
The words
Arnhem
Arnhem’s Rhine bridge was the furthest key objective. It was meant to open the way toward Germany, but the ground column could not reach it in time.
The plan, Landings and XXX Corps sections · National Army Museum: Arnhem and relief (opens a new tab)
Bittrich
Willi Bittrich commanded II SS Panzer Corps during the German response. His corps belonged to the Waffen-SS, whose units participated in the Holocaust.
Army history: the Arnhem landings (opens a new tab) · Holocaust Museum: the Waffen-SS (opens a new tab)
Drop Zones
The British drop zones lay well west of Arnhem. Successful landings still left the parachutists with a long approach before they could reach the bridge.
Ch. VII, pp. 169–170, landing success and distance · Army history: the Arnhem landings (opens a new tab)
First Airborne
The British 1st Airborne Division had few heavy weapons against German armor. Its troops fought in separated groups at the bridge and around Oosterbeek.
Arnhem section, dispersed positions and light armament · National Army Museum: Arnhem and relief (opens a new tab)
Frost
Lieutenant Colonel John Frost’s men held the bridge’s north end. Their attempts to gain the south end failed, leaving a foothold rather than a complete crossing.
Ch. VII, pp. 170–171, the bridge battalion · Army history: the Arnhem landings (opens a new tab)
Horsa Glider
Horsa gliders brought troops and equipment to Arnhem. They could carry soldiers, or transport a vehicle or an antitank gun.
Did you know?
Dumfries Aviation Museum’s surviving fuselage section had been converted into a caravan before its restoration.
Collection account, carrying role and Arnhem use · Dumfries Aviation Museum: the Horsa (opens a new tab)
Landing Zones
Gliders brought an airlanding brigade and supporting units. Some troops had to guard the landing areas for later lifts instead of advancing toward Arnhem.
Ch. VII, pp. 169–170, glider troops and zone defense · Army history: the Arnhem landings (opens a new tab)
Lodgement
A foothold held in enemy territory.
The airborne foothold north of the Rhine could not be held. Operation Berlin withdrew survivors rather than reinforcing the intended bridgehead.
Operation MARKET GARDEN section, objective and withdrawal · Canadian engineers: Operation Berlin (opens a new tab)
Oosterbeek
Survivors of the British division were evacuated from Oosterbeek. British and Canadian engineer companies carried out Operation Berlin on the night of September 25–26.
Opening history and Operation MARKET GARDEN section · Canadian engineers: Operation Berlin (opens a new tab)
Parachute
Parachute troops formed one part of the airborne force. Other men and heavier equipment arrived by glider, giving the division different landing and support needs.
The plan and Arnhem sections, parachute and glider forces · National Army Museum: Arnhem and relief (opens a new tab)
Perimeter
The outer boundary of a defended position.
The Oosterbeek perimeter contracted under German pressure. Wounded men faced shortages of food, water and medical supplies as the defense became increasingly confined.
Ch. VIII, pp. 185–186, the shrinking perimeter · Army history: the Oosterbeek perimeter (opens a new tab)
Relief Force
XXX Corps advanced toward the isolated airborne troops. A narrow causeway, traffic congestion, difficult ground and German resistance delayed the force trying to reach Arnhem.
XXX Corps section, obstacles to relief · National Army Museum: Arnhem and relief (opens a new tab)
River Rhine
The Rhine became the route of escape as well as an obstacle. Engineers used boats to bring survivors across at night under heavy fire.
Opening account and Operation MARKET GARDEN section, river evacuation · Canadian engineers: Operation Berlin (opens a new tab)
Supply Drop
Fog and low cloud disrupted supply flights and reinforcements. Communication failures also hindered operations as the lightly equipped troops tried to keep fighting.
Problems section, weather, communications and resupply · National Army Museum: Arnhem and relief (opens a new tab)
Urquhart
Major General Roy Urquhart commanded the 1st Airborne Division. He committed additional troops to reach Frost, but German resistance prevented a successful linkup.
Ch. VII, pp. 171–172, attempts to reach the bridge · Army history: the Arnhem landings (opens a new tab) · National Army Museum: Arnhem and relief (opens a new tab)
Sources
- The Siegfried Line Campaign, Chapter VII: Invasion From the SkyU.S. Army Center of Military History; Charles B. MacDonald, official history, 1963; HyperWar transcription
- The Siegfried Line Campaign, Chapter VIII: Decision on the GroundU.S. Army Center of Military History; Charles B. MacDonald, official history, 1963; HyperWar transcription
- Operation Market GardenNational Army Museum; historical campaign account
- Commemorating WW II Operation BERLIN - The Evacuation from ArnhemCanadian Military Engineers Association; Bill McVean and Ken Holmes, July 14, 2016
- Airspeed HorsaDumfries Aviation Museum; collection history and original fuselage provenance
- Waffen-SSUnited States Holocaust Memorial Museum; Holocaust Encyclopedia